Turkey Soup

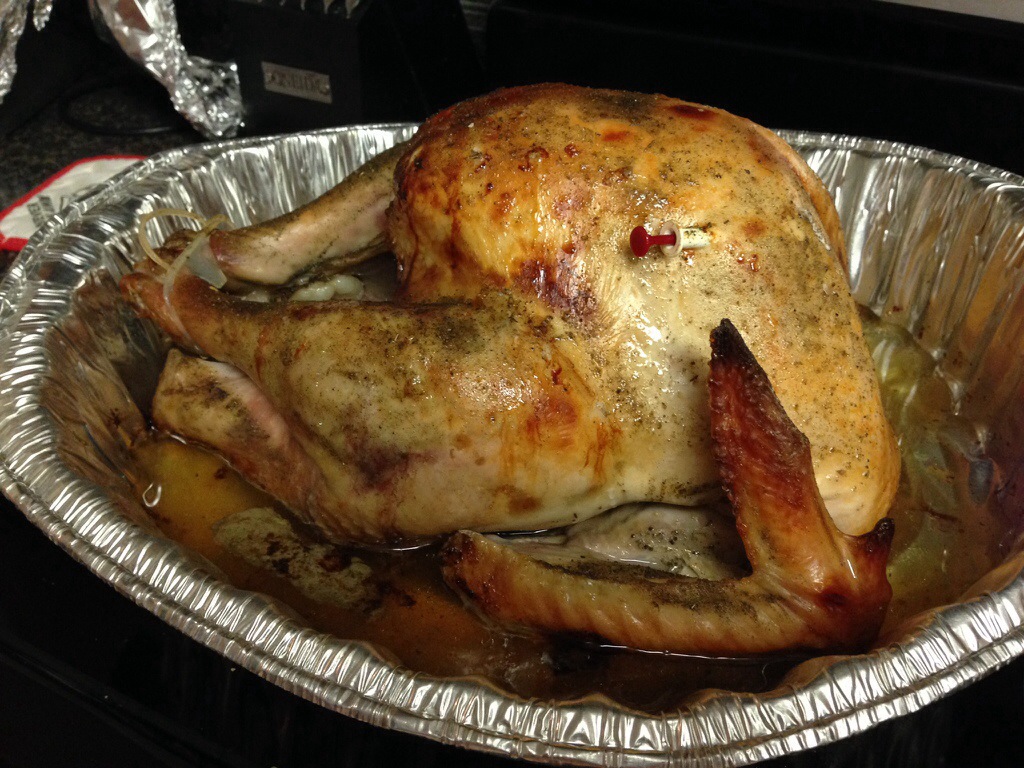
I had the leftover turkey carcass from Christmas sitting in my fridge, so I decided to make soup with it. This was actually my first time making a stock from the bones, but I think it came out pretty well and the house smelled so divine! Depending on what meat you use in your soup, will make a difference in how rich it is, because of the fat content. I had a lot of dark meat leftover, so my soup tasted richer and heartier. I imagine it would be a bit lighter if you only used the white meat. Normally I’m more of a fan of the light meat, but dark is what I had, and you really can’t tell the difference much in a soup.

Ingredients:

Stock:
– 1 turkey carcass picked as clean as you can get it
– 12 cups of water
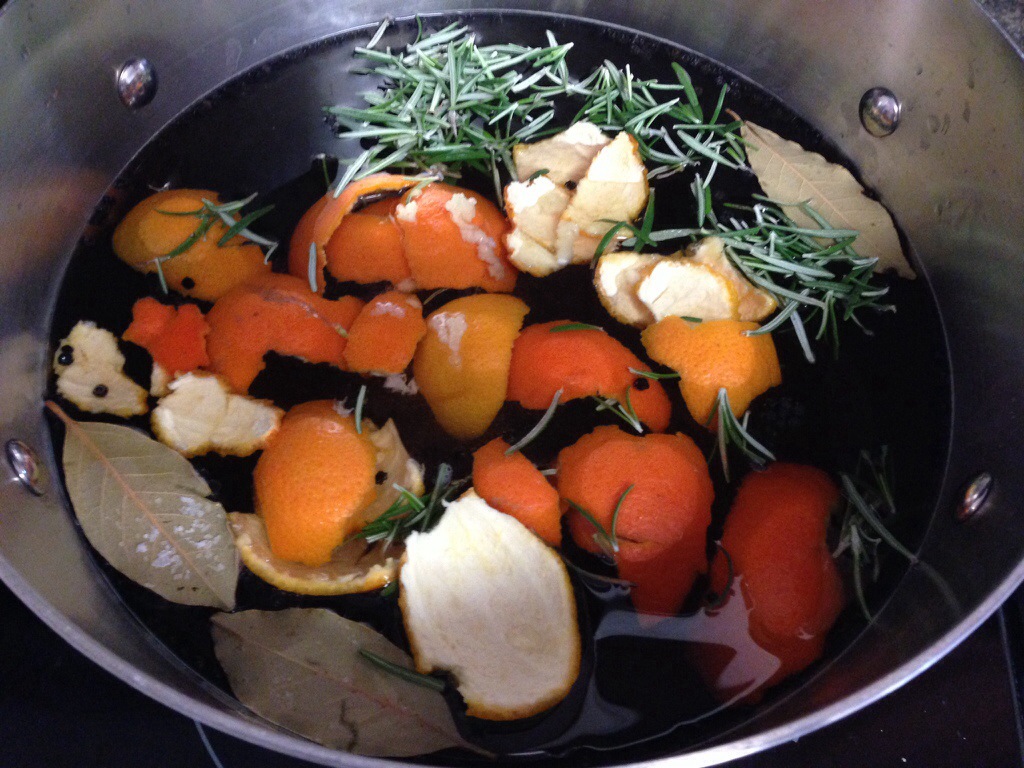
– celery, carrots, onion, or any other vegetables you want for added flavor.
– 2 tbsp. garlic

Begin by breaking up your carcass to fit in your stockpot. Give your vegetables a rough chop and throw them in the pot. You won’t be using these vegetables in your soup, so they don’t have to be pretty. Add in your garlic, and the water.
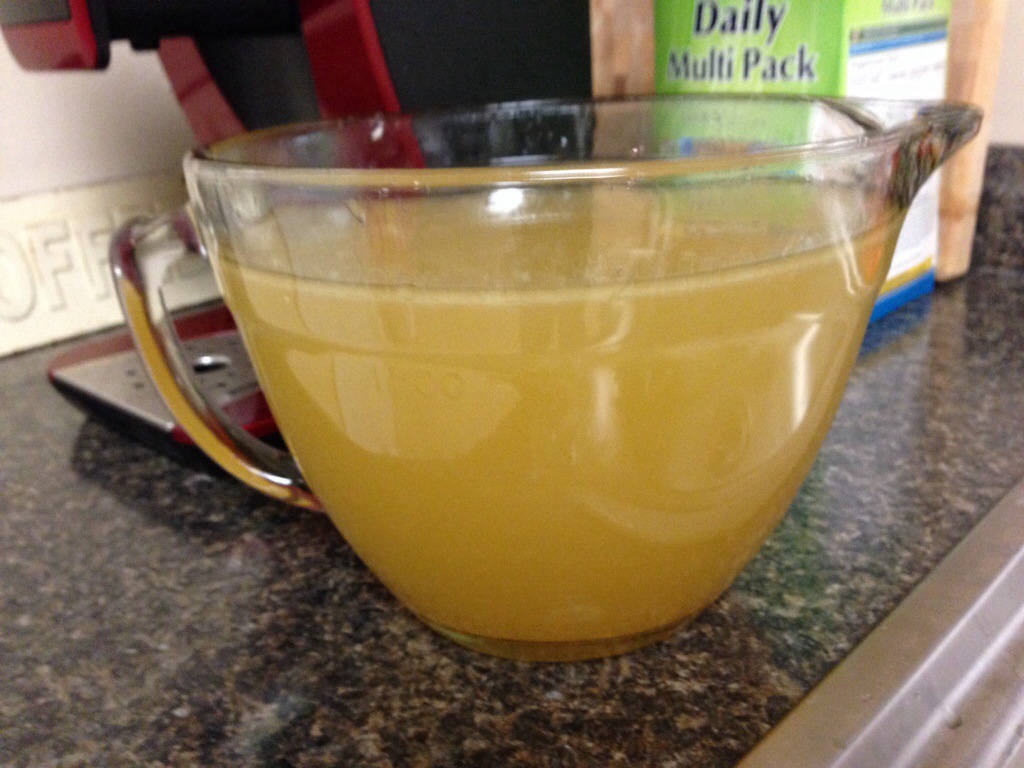
Turn your pot to low, cover, and let cook for 4 hours. Once the time is up get a large bowl and set a colander on top of it. Drain the contents from your stockpot into the big bowl, only reserving the liquid. Let cool completely and then refrigerate.

20131227-151954.jpg

20131227-152005.jpg

20131227-152011.jpg

To assemble the soup:

Ingredients:
– 1 bunch celery, chopped
– 7-8 carrots, sliced
– 1/2 a large onion, diced
– 3/4 of a box of any pasta of your choice
– your prepared turkey stock
– the leftover turkey meat
– basil, celery seed, salt, and pepper and any other seasonings of your choice. I like this combination, the basil gives it a slightly sweet note.
– 2 tbsp. butter

Directions:
In a large stockpot, melt the butter and add in the onion and celery. Sauté the vegetables until the onions are translucent, but not brown. Add in the turkey stock and the carrots. Cook until the carrots are slightly tender. Add in the seasonings that you want and adjust to taste. Finish by adding the noodles and the turkey. Cook until the noodles are tender. Let soup cool to room temperature and then refrigerate, or serve immediately.

20131227-152908.jpg

20131227-152914.jpg

20131227-152920.jpg

20131227-152929.jpg

20131227-152934.jpg

20131227-152939.jpg

Cranberry Bliss Bars

This is a Starbuck’s copycat recipe of their bliss bars that they have every Holiday season. I first fell in love with these in high school and have tried to go in and get one every year since. This is a pretty good copycat recipe, although the one I made last Christmas was a bit better if I remember correctly. I just cannot find the one I used last year, these were still good though and a hit at our Christmas dinner.
Enjoy!

Ingredients:

Blonde Layer:
– 3/4 cups ( 1 1/2 sticks) butter
– 1 1/2 cups packed light brown sugar
– 2 large eggs
– 3/4 tsp. vanilla extract
– 2 1/4 cups all- purpose flour
– 1 1/2 tsp. baking powder
– 1/4 tsp. salt
– 1/8 tsp. ground cinnamon
– 1/2 cup dried cranberries (I used craisins)
– 6 ounces baking white chocolate

Frosting:
– 1 (8 oz) package softened cream cheese
– 1 cup powdered sugar
– 6 ounces white baking chocolate, melted (and divided)
-1/2 cup dried cranberries
– 1 tsp. grated orange zest, optional

Directions:
Preheat your oven to 350F. Spray a 9x 13-inch pan generously with nonstick cooking spray.
Prepare the blonde layer: in a medium bowl, melt butter in the microwave until melted and stir in the brown sugar. Pour the butter and sugar into the bowl of your mixture and let it cool to room temperature. Add in the eggs and vanilla and mix just until combined.
In a separate bowl, whisk together the flour, baking powder, salt, and cinnamon. Gradually add this mixture to the egg sugar mix and blend until combined. Stir in the cranberries and the white chocolate. The batter will be very thick.
Spread the blondie batter into the prepared pan. Bake for 20 minutes, or until a toothpick inserted in the center comes out clean. Watch this closely so you do it over bake. Let cool completely on a wire rack.
For the frosting: clean your mixing bowl and place the cream cheese and powdered sugar in it. Beat this until combined. Gradually add half the melted white chocolate; beat until combined. Frost bars. Sprinkle with the rest of the cranberries and orange zest if desired. Drizzle with the remaining white chocolate. Refrigerate until ready to serve. Cut bars in triangles when ready to serve.

20131227-145914.jpg

20131227-145929.jpg

20131227-145941.jpg

20131227-145950.jpg

20131227-150001.jpg

20131227-150013.jpg

20131227-150030.jpg

20131227-150042.jpg

20131227-150051.jpg

20131227-150107.jpg

20131227-150217.jpg

20131227-150230.jpg

20131227-150240.jpg

20131227-150248.jpg

20131227-150303.jpg

20131227-150312.jpg

20131227-150325.jpg

20131227-150341.jpg

20131227-150348.jpg

20131227-150356.jpg

Cranberry Sauce

I’ve always had cranberry sauce out of the can, you know the one that you just dump out and cut in slices and serve. It seems a lot of people do that and that circle is almost a part of pictured holiday meals. This year however, my husband’s aunt made homemade cranberry sauce for Thanksgiving and it was delicious! I tried my hand at it for Christmas and it was so good and a cinch to make! Here’s what you’ll need!

Ingredients:
– 1 twelve ounce bag fresh cranberries. Watch for these to go on sale around the Holidays and then grab a few. You can freeze them very successfully and have fresh cranberries the whole year through!
– 1 cup water
– 1 cup sugar

Directions:
Rinse and drain cranberries. Add sugar and water to a medium saucepan. Stir and then bring the mixture to a boil. Add cranberries, and return to a boil. Reduce heat and boil gently for 10 minutes, stirring occasionally. Once cooked, pour cranberry sauce into a bowl and allow to cool. Once cooled, cover and refrigerate until ready to serve. Easy peasy!

20131226-155912.jpg

20131226-155919.jpg

20131226-155928.jpg

The best stuffing!

Oh stuffing. Stuffing is one of those things that a lot of people aren’t that hot on, I think one of the main reasons is because it’s usually pretty dry, and can just taste like you’re eating chewy breadcrumbs if not prepared the right way. Well ladies and gentleman I am here to save the day and give you a superb recipe for flavorful, moist stuffing!

Ingredients:
– 1 bunch celery, chopped
– 1 onion, diced
– 2 boxes stuffing mix
– 3 cups chicken broth
– 8 tbsp. (1 stick) of butter and then some for sautéing

Begin by melting a couple of tbsp. of butter in a large sauté pan. Sauté the celery and the onions until the celery is soft but still firm and the onions are translucent.
Boil 3 cups of chicken broth, and add in the stick of butter. Melt the butter down completely and then add it to the pan with the vegetables. Add in the boxed stuffing mix, and cover with a lid. Let stand 5 minutes, then fluff with a fork.

20131226-154944.jpg

20131226-154953.jpg

20131226-155002.jpg

20131226-155008.jpg

20131226-155015.jpg

20131226-155024.jpg

20131226-155031.jpg

20131226-155039.jpg

20131226-155047.jpg

Brining and roasting a turkey!

Brining a turkey was a strange concept tome until about 3 years ago, when one of my co-workers, who would later become one of my best friend’s, introduced it to me. She is from the South and brining is apparently pretty typical around here, where a so the West Coast, not so much. She promised me that I hadn’t lived until I had eaten a turkey that had been brined, she was indeed correct! I now brine my turkeys every year and have even done a pork chop in a brine with great results. You must, must, must try a brine the next time you’re going to cook a turkey! This particular brine is from The Pioneer Woman, it’s the first brine and only one for that matter that I’ve ever tried. I’m very happy with it, and know you will be too!

Ingredients:
– 3 cups apple cider or apple juice
– 2 gallons (32 cups) cold water
– 4 tbsp. Fresh rosemary leaves
– 5 cloves garlic, minced
– 1 – 1 1/2 cups salt
– 2 cups brown sugar
– 3 tbsp. whole peppercorns
– 5 whole bay leaves
– peel of three large oranges
– brining bag
– butter, about a half stick
– poultry seasoning

This concoction is enough for a 20 pound turkey, you can halve it for a smaller bird, if needed.

Directions:
Combine all ingredients in a large stockpot. Stir until the salt and sugar dissolve. Bring to a boil, then turn off the heat and cover. Allow to cool completely. Now, I would recommend making your brine about a day before you need it. I had forgotten how long it takes for this amount of liquid to boil, let alone cool down completely. I tried to make mine the day before I was going to cook the turkey, and i don’t feel like I had enough time for it to really reach it maximum potential. Next year, I’m going to do the brine about 2 days in advance, so it has adequate time to cool down and I’m not trying to rush it. (See pictures below) 😉

When your brine is ready, you’ll want to prepare your turkey. Start by rinsing off your turkey, remove the neck and the giblets packet. I know some people boil the neck to make soup and use the giblets for things, but I never do and they always just go in the trash. Rinse out the cavity and pat your bird dry.

Now, place your turkey in the brining bag, and pour the cooled brine into the bag with the turkey. The brine should be at least halfway up the bird. Place your brine and turkey in the refrigerator and refrigerate for 16-24 hours. 16 hours is alright, but 24 is better. I also usually flip my turkey about halfway through the brining time so the whole thing gets a chance to soak up some of that delicious liquid!

About a half hour before you want to get your turkey in, preheat oven to 325F and rinse off your turkey. Don’t worry, you’re not washing away the brine, just giving him a good rinse so the skin isn’t too salty. Remove from the sink and pat completely dry with paper towels. (Always remember to sanitize your sink before and after having the turkey in, as not to spread germs). Rub your turkey down with butter and then sprinkle him with poultry seasoning. Cover with foil and roast according to your directions on the turkey packaging. During the last hour of roasting, I remove the foil and let it roast uncovered. This will give the turkey some nice color and look a lot more appealing than a pale bird! 😉

Once your turkey has reached an internal temperature of 165F you can remove it from the oven and let it rest for about 20 minutes. Then, find a handy person who knows how to carve a turkey (that which I am not) and carve away that scrumptious bird! Your guests will swoon over your soft, moist turkey, and beg your for your method I promise!

20131226-153249.jpg

20131226-153301.jpg

20131226-153312.jpg

20131226-153323.jpg

20131226-153332.jpg

20131226-153345.jpg

20131226-153355.jpg

20131226-153406.jpg

20131226-153419.jpg

20131226-153429.jpg

This is what happens when you forget how long it takes for that much liquid to cool… It ends up outside!

20131226-153545.jpg

20131226-153602.jpg

20131226-153614.jpg

20131226-153624.jpg

20131226-153644.jpg

This is after the turkey has been removed from the brine, and is getting a lathering of butter!

20131226-153729.jpg

20131226-153738.jpg

20131226-153747.jpg

Notice how he still looks a bit pale, I stuck him in for about 40 minutes more to get some color.

20131226-153855.jpg

Well hello Mr. Handsome! Much better!
Enjoy!

Christmas at The Campbell’s

Here are some pictures of some of the projects I’ve been up to and how Christmas is looking in the new house! 🙂

20131222-074638.jpg

My wreath! Super simple, all you need is some Dollar Store ornaments of different sizes, a glue gun, and a wire wreath. Plus a ridiculously large bow! 😉 you just remove the ornament tops and then glue them upside down to your wire wreath so the tops aren’t showing. Add a bow and a ribbon to hang it and voila! Christmas wreath, I made this for under $20!

20131222-074908.jpg

20131222-074945.jpg

20131222-074959.jpg

20131222-075013.jpg

20131222-075027.jpg

20131222-075053.jpg

20131222-075105.jpg

20131222-075204.jpg

20131222-075215.jpg

20131222-075227.jpg

20131222-075253.jpg

20131222-075304.jpg

This year I decided to make homemade stockings for us… I don’t own a sewing machine, so I made them all by hand with a needle and thread. They were a lot more of a project than I was expecting, but I’m really happy with the results and am thinking I need to invest I. A sewing machine in the near future 😉

20131222-075516.jpg

20131222-075528.jpg

20131222-075547.jpg

20131222-075557.jpg

20131222-075700.jpg

20131222-075748.jpg

20131222-075807.jpg

20131222-075816.jpg

20131222-080617.jpg

20131222-080631.jpg

Merry Christmas!!!

Chocolate Crinkle Cookies

Each year I like to try out a new cookie recipe for Christmas, there are so many of them out there that look good, so it gets really hard to pick one! I didn’t have much in my cupboards when I went to make them, so I decided on this simple cookie recipe. They are a recipe that you have to refrigerate the dough for, so it does involve waiting a bit, but boy were they worth it!
Hubby loved them, and told me they’ll have to be a must from Christmas’ here on out 🙂 Also, my neighbors really liked them, so it’s a win-win in my book! 🙂 They are fudge, light as air, but chewy at the same time. They taste like a light brownie to me, definitely a must try!

Ingredients:
– 1 cup unsweetened cocoa powder
– 2 cups granulated sugar
– 1/4 cup canola oil
– 1/4 cup melted butter
– 4 eggs
– 2 tsp. vanilla extract
– 2 cups all- purpose flour
– 2 tsp. baking powder
– 1/2 tsp. salt
– 1/2 cup confectioners’ sugar

Directions:
In a small bowl, combine the flour, baking powder, and salt, set this aside.
In the bowl of your stand mixer, combine the cocoa, white sugar, vegetable oil, and butter. Once this mixture is combined, add the eggs one at a time, beating well after each addition. Add in the vanilla.
Add the flour mixture gradually that you set aside earlier to the bowl. This mixture will be pretty thick, and look very fudgy.
Cover the dough and chill for at least 4 hours, I did mine overnight.
Preheat your oven to 350F. Line cookie sheets with parchment paper. Set out a plate with your powdered sugar on it, close to your batter bowl, for easy rolling. Scoop out a spoonful of dough and drop it right in the powdered sugar. Coat the dough with the powdered sugar and then roll into a ball, place on the lined cookie sheets.
Bake in your preheated oven, one tray at a time. Bake the cookies for 10-12 minutes. Mine came out closer to the 12 minute mark. You want to remove them when the tops are firm. They might not look completely baked but will continue to cook once out of the oven. Let them cool on their baking trays for a couple of minutes and then remove them to wire racks to finish cooling completely.

20131222-074301.jpg

20131222-074310.jpg

20131222-074318.jpg

20131222-074325.jpg

20131222-074334.jpg

20131222-074342.jpg

20131222-074355.jpg

20131222-074402.jpg

20131222-074408.jpg

20131222-080753.jpg

20131222-080800.jpg

Also, I got to put my cookies in that beautiful cookie jar! My lovely friend, Maxene bought it for me for my birthday 🙂 Josh and my birthday’s are two days apart (same year and everything) so that happened while I have been away. We turned the “old” age of 24, and were stuck in an airport overnight coming back to Georgia. Not one of the finest birthdays I’ve had, but it definitely makes for a good story and we even saw Guy Fieri from the Food Network!

Oh, and those little bags are the cookies for the neighbors 🙂

Sharpie mugs!

I’ve seen these adorable mugs that people make, and just fell in love with them! I made a bunch for some family and friends for Christmas and they came out really cute 🙂 I’ve read different versions of how to make them, and this way seems like the best for keeping the ink on. I have not tried this myself and am not 100% sure that the ink will not come off in the dishwasher, so it might be best to hand wash them just to be certain it stays intact.
Here is my method:

Supplies:
– ceramic mugs, I just bought mine at the dollar store
– sharpie pen
– oven
– cookie tray
– rubbing alcohol

Directions:
Start by cleaning your mug with rubbing alcohol. This will take any of the oils from people’s hands off the mug and make the ink stay better. Once dry, decorate your mug with the sharpie any way you desire.
Place the mugs on your cookie sheet and place them in your cold oven. Turn your oven to 350F and let the mugs warm up in the oven to temperature. Once your oven reaches 350F bake your mugs for 30 minutes. Once the time is up, turn off the oven and leave the mugs in to cool off completetly. This is supposed to help the ink set better than just baking and removing them.
Once cooled completely, remove the mugs and wrap up! I placed a packet of single serve hot chocolate mix in each one as well as dipping a plastic spoon in chocolate and rolling them in marshmallows.

20131221-163519.jpg

Buckeyes (aka Peanut Butter Truffles)

Buckeyes… Just excuse me as I swoon over here! 🙂 these are absolutely decadent, very rich though so you can only eat a couple in one sitting, but perfect for this time of year. The peanut butter and chocolate is so comforting and makes you just want to curl up by the fire with a good book while the snow falls outside! They’re THAT good! 😉 Also an incredibly fast little recipe, so you really can’t go wrong!

Ingredients:
– 1 1/2 cups creamy peanut butter
– 1 cup butter, softened
– 1/2 tsp. vanilla extract
– 6 cups confectioner’s sugar
– 4 cups semi-sweet chocolate chips
– 1-2 tsp. of canola oil

Directions:
In a large bowl, mix the peanut butter, butter, vanilla, and confectioners’ sugar. The dough will expertly dry. Roll into 1-inch balls and place on a parchment paper lined cookie sheet.
Chill in the freezer for about 30 minutes, or until firm. A good trick before placing them in the freezer is to stick a toothpick it the top of each one, this will make for easier dipping later on.
Place chocolate chips and the canola oil in a microwave safe bowl and melt in the microwave for about 1 minute. I do intervals of about 30 seconds, until it’s melted completely.
Dip frozen peanut butter balls in chocolate, holding onto the toothpick. Leave a small portion at the top to look like eyes. Put the dipped chocolate balls back on the cookie sheet and refrigerate until ready to serve.

20131221-161829.jpg

20131221-161851.jpg

20131221-161904.jpg

20131221-161921.jpg

20131221-161935.jpg

20131221-161956.jpg

20131221-162012.jpg

20131221-162029.jpg

20131221-162040.jpg